
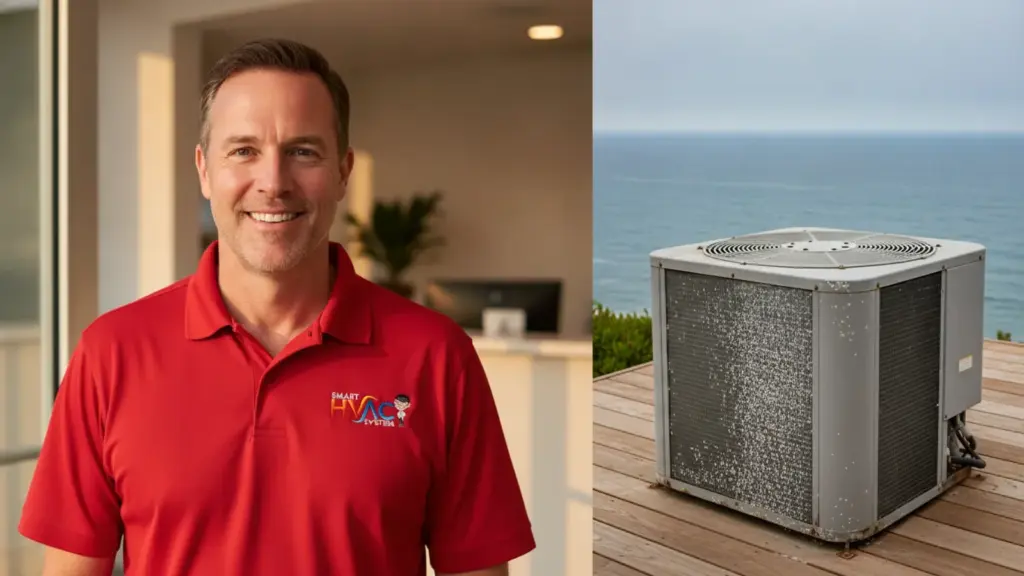
How to Prevent Rust on Beachfront Air Conditioners in Malibu
Corrosion rarely announces itself. By the time rust is visible on a Malibu beachfront air conditioner, the damage underneath is usually far worse than it looks. Salt-laden marine air works its way into aluminum fins, copper coils, and steel cabinet seams every single day, and the closer a home sits to the Pacific, the faster that process unfolds. Malibu properties along Pacific Coast Highway and the Carbon Beach stretch face some of the highest ambient salt-load conditions in Southern California, which means a unit left unprotected for even one off-season can lose measurable efficiency before the next cooling cycle begins.
The good news is that corrosion protection for HVAC equipment is a solvable problem when approached as a routine process rather than a one-time fix. This guide walks through each protective step in order, from what to gather before you start to when a licensed technician needs to take over. For a broader look at how ocean air degrades entire heating and cooling systems, see our coastal HVAC maintenance guide for Malibu homeowners.
Before You Start: What You’ll Need
- Garden hose with an adjustable spray nozzle (low-pressure setting)
- Coil cleaning solution rated for aluminum fins (no acid-based formulas on copper coils)
- Soft-bristle fin comb or fin brush
- Corrosion-inhibiting coil coating (phenolic or epoxy-based, labeled for marine environments)
- Rust-inhibiting enamel spray rated for outdoor metal (for cabinet touch-ups)
- Stainless-steel or coated fasteners (to replace any corroded screws)
- Nitrile gloves and safety glasses
- Soft cloths or microfiber towels
- A licensed HVAC technician’s contact information for any refrigerant or electrical components
A quick note on safety: steps that involve the electrical disconnect, refrigerant lines, or internal components are clearly marked below as professional territory. Everything else in this guide is safe for a careful homeowner to handle on the exterior of the unit.
Step 1: Power Down and Inspect the Unit Thoroughly
Before touching anything, switch the thermostat to “off” and turn off the circuit breaker that feeds the outdoor condenser. For added safety, pull the disconnect block from the weatherproof box mounted near the unit. Malibu’s coastal humidity means electrical contacts can corrode faster than in inland areas, so visually inspect the disconnect housing for greenish oxidation or pitting while you have it out. Do not attempt to clean or repair the electrical disconnect yourself; note any corrosion you see and flag it for a technician.
With power safely off, walk around the entire cabinet. Look for rust streaks running down from screw holes, bubbling paint on the cabinet panels, whitish salt deposits on the fins, and any areas where the protective coating has flaked away. Take photos. This baseline record helps you track whether your protective routine is slowing the corrosion rate over successive seasons, which is the realistic goal for any beachfront property in Malibu.
Step 2: Clear Debris from Around and Inside the Cabinet
Salt crystals are hygroscopic, meaning they pull moisture from the air and hold it against metal surfaces. Any organic debris sitting against the cabinet (dried kelp blown up from the beach, dead leaves, dirt) traps additional moisture and accelerates rust formation. Remove all debris from the base pan, the top grille, and the area within two feet of the unit.
If your unit has a removable top grille, lift it off and clear any material that has settled onto the fan blade or around the motor housing. Avoid bending the fan blades; they are balanced components and even minor deformation causes vibration that shortens motor life. Set the grille aside on a clean surface for inspection.
Step 3: Rinse Salt Deposits from the Condenser Coils
This step is one of the highest-impact actions a Malibu homeowner can take for corrosion protection. Salt crystals that accumulate between the aluminum fins act as a continuous electrolytic cell whenever moisture is present, which in a marine environment is essentially always. Rinsing them away interrupts that process.
If you want it handled correctly the first time, consider professional heating cooling in Malibu.
Using your garden hose on a gentle, wide-fan spray setting, rinse the coil fins from the inside out if your unit’s design allows access, or from the outside in if not. The goal is to flush salt through and out, not to drive it deeper. Keep the spray at roughly a 45-degree angle to the fin surface rather than straight-on, which can bend the delicate aluminum fins. Work from top to bottom in steady, overlapping passes. For a more detailed walkthrough of this rinsing process specific to Malibu conditions, this guide on washing salt off outdoor HVAC units covers timing and frequency in depth.
Do not use a pressure washer. The fin material on most residential condensers is thin enough that even moderate pressure can crush the fins flat, blocking airflow and forcing the compressor to work harder.
Step 4: Apply Coil Cleaner and Rinse Again
After the initial salt rinse, apply a no-rinse or self-rinsing coil cleaner formulated for aluminum fins. Follow the product directions for dilution and dwell time. Most foaming cleaners need three to five minutes to penetrate oxidation and lift residual salt compounds before the next rinse. Avoid any cleaner with a strongly acidic pH on aluminum; it will cause more corrosion than it prevents. Copper refrigerant lines exposed at the coil face are also vulnerable to acidic cleaners, so confirm the product is rated safe for both metals before applying.
Once the dwell time is complete, rinse thoroughly again using the same low-pressure, top-to-bottom technique from Step 3. The rinse water should run clear by the end. If it is still discolored or foamy, repeat the rinse until it clears. Allow the coil assembly to air-dry completely before moving to the coating step; applying a protective coating over wet fins traps moisture rather than sealing it out.
Step 5: Straighten Bent Fins with a Fin Comb
Bent or crushed fins reduce the surface area available for heat exchange, which forces the compressor to run longer cycles to meet the thermostat setpoint. In Malibu’s summer heat, longer cycles mean more electricity and more wear on a compressor that is already contending with salt-air stress. A fin comb, sized to match your unit’s fin density (usually expressed in fins per inch, printed on the unit data plate or available from the manufacturer), straightens individual fins without removing them.
Work slowly and methodically across the coil face. The objective is not perfection but restoration of adequate airflow channels. Any section of fins that is so severely damaged that the comb cannot straighten them, or where the underlying tubing is visibly corroded, should be noted for a technician to assess. Refrigerant tube corrosion is beyond safe homeowner repair scope. To understand what that kind of damage looks like and when it signals a larger problem, this overview of signs a coastal HVAC system needs repair is a useful reference.
Step 6: Apply a Marine-Grade Corrosion-Inhibiting Coil Coating
This is the step that most homeowners skip, and it is the one that makes the biggest difference in how long a Malibu beachfront unit holds up between professional services. A phenolic or epoxy-based coil coating creates a physical barrier between the aluminum fins and the salt air, slowing the electrochemical reaction that causes oxidation.
With the coil completely dry, apply the coating according to the product instructions. Most marine-rated coil coatings come in aerosol form for even coverage. Hold the can at the recommended distance (typically eight to twelve inches) and apply in smooth, overlapping passes. A thin, even coat is more effective than a thick one; heavy application can partially block the fin channels and reduce airflow. Allow full cure time before restoring power, which is usually several hours at ambient temperature.
Reapplication frequency for Malibu properties depends on how close the unit sits to the water. Units within a few hundred feet of the shoreline, particularly those on Carbon Beach or Point Dume, typically benefit from recoating annually. Units set back further from the surf line may hold a coating for two seasons. Your technician can assess the coating condition during a routine service visit and advise on timing specific to your property.
Many Malibu homeowners rely on expert heating cooling in Malibu for exactly this.
Step 7: Treat and Protect the Cabinet Exterior
The condenser cabinet is usually galvanized steel with a baked enamel finish. Salt air attacks that finish at any chip, scratch, or fastener penetration point. Once rust starts at a screw hole, it spreads under the surrounding paint in a process called undercutting, eventually causing large sections of the cabinet to fail structurally.
Inspect every screw hole, seam, and panel edge. Any fastener showing rust should be replaced with a stainless-steel or coated equivalent (standard zinc screws corrode quickly in marine environments). For areas where the paint has chipped or bubbled, use fine-grit sandpaper to remove loose material down to bare metal, then apply a rust-inhibiting primer followed by an outdoor enamel rated for metal. Small touch-ups done consistently prevent the need for full cabinet replacement later.
Some Malibu homeowners apply a thin coat of marine-grade paste wax to the exterior cabinet panels after painting, similar to protecting a boat hull. This is not a substitute for paint maintenance but does add a sacrificial layer that slows salt adhesion between cleanings.
Step 8: Inspect and Protect Refrigerant Line Connections and Electrical Conduit
The copper refrigerant lines running between the outdoor condenser and the indoor air handler pass through a weatherproof fitting or conduit at the cabinet wall. The insulation jacketing on these lines can crack over time, especially in Malibu’s UV-intense environment, exposing the copper beneath to salt air. Visually inspect the insulation for cracks, gaps, or sections where it has pulled away from fittings.
Cracked insulation can be wrapped with self-amalgamating (self-fusing) tape as a temporary measure, but a technician should assess whether the underlying copper shows any corrosion or pitting before the next cooling season. Similarly, the electrical conduit running to the unit should be checked for any gaps where the conduit enters the cabinet; salt-laden moisture that enters conduit runs can corrode wiring connections over time. Sealing small gaps with outdoor-rated silicone is appropriate homeowner maintenance; anything involving the wiring inside the conduit or at the disconnect is a licensed electrician’s or HVAC technician’s job.
Step 9: Restore Power and Run a Function Check
Once all coatings are fully cured and the cabinet is reassembled, restore power in reverse order: insert the disconnect block, then flip the circuit breaker. Set the thermostat to cooling mode and let the system run for a full cycle. Stand near the outdoor unit and listen for any unusual rattling, grinding, or high-pitched squealing, which can indicate a fan blade that was inadvertently disturbed during cleaning or a bearing that was already marginal.
Check that air is moving freely through the top of the unit and that the cabinet is not vibrating excessively against any mounting hardware. If the system runs a full cycle quietly and the indoor supply registers are delivering cool air within a few minutes, the protective service was successful. Log the date and what products you used so you have a maintenance record to share with your technician at the next professional visit.
When to Call a Professional in Malibu
Several conditions go beyond what safe homeowner maintenance can address, and attempting them without proper training and equipment can create safety hazards or void equipment warranties.
Ready for the next step? Learn how heating cooling services in Malibu can help and reach out to the team.
- Refrigerant leaks: If you notice ice forming on the refrigerant lines, a hissing sound, or a significant drop in cooling performance after cleaning, the system may have a refrigerant leak. Handling refrigerant requires EPA Section 608 certification; call a licensed technician.
- Visible corrosion on refrigerant tubing: Pitting or greenish oxidation on the copper lines at the coil face indicates the tubing wall may be compromised. A technician needs to pressure-test the system before the next season.
- Electrical component corrosion: Green or white oxidation on the contactor, capacitor terminals, or wiring connections inside the cabinet requires a licensed technician to clean or replace safely.
- Severely damaged coil fins: If more than roughly 20 percent of the coil face has crushed or corroded fins that cannot be straightened, a technician should evaluate whether coil replacement is more cost-effective than continued maintenance.
- Annual professional service: Even when homeowner maintenance is done consistently, a professional inspection and tune-up once a year catches developing issues before they become failures. For Malibu properties within a quarter mile of the shoreline, twice-yearly professional service is a reasonable approach given the accelerated corrosion environment.
Choosing the right technician for coastal equipment matters. Selecting a contractor with coastal HVAC experience ensures the person servicing your system understands marine corrosion patterns, uses appropriate materials, and does not recommend inland-standard maintenance intervals that fall short of what Malibu conditions actually require.
For a complete picture of how salt air affects not just the condenser but the entire system including the air handler, ductwork, and controls, the full guide to HVAC maintenance in Malibu’s coastal environment covers each component in detail and explains the science behind accelerated coastal degradation.
Frequently Asked Questions
How often should I rinse salt off my Malibu beachfront air conditioner?
For properties within a few hundred feet of the water, a monthly rinse during the spring and summer months is a practical baseline. Properties set further back from the shoreline may manage well with a rinse every six to eight weeks. After any period of strong onshore winds or marine layer fog events, an additional rinse is worthwhile regardless of the regular schedule.
Will a coil coating void my equipment warranty?
Most manufacturers do not void warranties for the application of approved aftermarket coil coatings, but the specific product and application method matter. Check your equipment documentation or contact the manufacturer before applying any coating, and keep the product label and application records in case a warranty question arises later.
What is the difference between a phenolic coating and an epoxy coating for coils?
Both create a corrosion-resistant barrier, but epoxy coatings tend to be harder and more durable under heavy salt load, while phenolic coatings often offer slightly better flexibility and adhesion to aluminum fin stock. For Malibu beachfront applications, either is a significant improvement over an uncoated coil; your HVAC technician can recommend the product they have had the best results with in local conditions.
Can I use the same anti-rust approach for my heat pump as for a standard AC condenser?
Yes, the exterior coil cleaning, coating, and cabinet protection steps in this guide apply equally to heat pump condensers. The key difference is that heat pumps operate year-round in both heating and cooling modes, so they accumulate salt exposure during winter months when a cooling-only system might sit idle. This makes consistent year-round maintenance even more important for heat pump owners along the Malibu coast.
How do I know if the salt damage to my unit has already progressed too far to benefit from protective coatings?
If the coil fins are more than roughly a quarter corroded through, if the refrigerant tubing shows visible pitting, or if the cabinet has structural rust holes rather than surface oxidation, a technician’s assessment is the right next step before investing in coatings. Protective products work best as prevention or early-stage treatment; they cannot reverse significant existing corrosion. The guide to salt-air damage in Malibu air conditioners describes what progressive corrosion looks like at each stage.
Keeping Your Malibu AC Running Through Every Season
Rust and salt corrosion on a beachfront air conditioner are not inevitable failures; they are predictable outcomes of a specific environment, which means they respond well to a consistent, informed prevention routine. The steps above, done in order and repeated on a regular schedule, can meaningfully extend the service life of a condenser unit and reduce the likelihood of a mid-summer breakdown when Malibu temperatures climb and the system is working hardest.
If your unit is overdue for a professional corrosion assessment, or if you have noticed signs of accelerated rust and want a technician’s evaluation before the next cooling season, reach out to Smart HVAC System. Our team works with Malibu’s coastal conditions routinely and can recommend a maintenance plan scaled to your property’s specific proximity to the water.